by Susan Dean | Feb 1, 2018 | Self Science
OUTDOOR CLASSROOM DESIGN BASICS
In designing children’s outdoor environments the goal is to use the landscape and nature as much as possible. It is desirable to integrate the outdoor and indoor classroom with one sense of place and identity so the transition is seamless.
A design that allows children to go back and forth encourages children to experiment with autonomy from adults, both physically and symbolically. The outdoor space becomes part of the classroom, rather than a retreat from the classroom. Many teachers are choosing to run indoor/outdoor programs and free snack times to enable and enhance the long stretches of uninterrupted play times.
The outdoor classroom should be made of natural materials such as logs, stumps and boulders and the landscape created in natural ways with berms and mounds. The simplest way to include natural play elements in the outdoor classroom is by adding natural parts like stones, logs, sand, trees and water or an organic garden. It will encourage self directed exploration and discovery.
You can build a trench in the sand and dirt or a rock dam over a stream, but there’s not much you can do to a jungle gym except climb, hang, or fall off. Natural elements provide for open-ended play that emphasizes unstructured creative exploration with diverse materials. The complexity and variety nature offers invites longer and more complex play. Because of their interactive properties, plants stimulate discovery, dramatic pretend play, and imagination.
Teacher training and many other resources are available for you to get started on your outdoor classroom and lots of great books to help too.
Components of an Outdoor Classroom:
Sand and water play area – A sand pit offers the wild play opportunities of the beach. If you must cover it think about using light fabric that lets air and water through and is easy to cover and recover. Sand is best if it can be mixed with water.
Water is one of the greatest play and experimentation elements for young children. Create opportunities for water play and discovery. Introduce water to the sand area. It can be as simple as adding a hose line to the sand area. Simple drainage underneath the sand will keep water from pooling up. Use hoses, water tables, tubs, sprinklers, gutters, spray bottles, and ice!
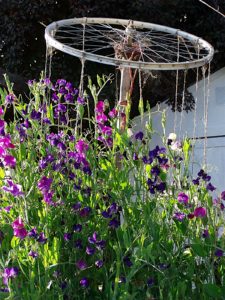
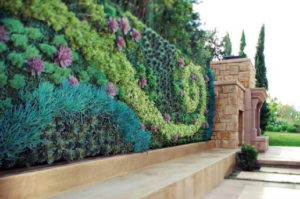
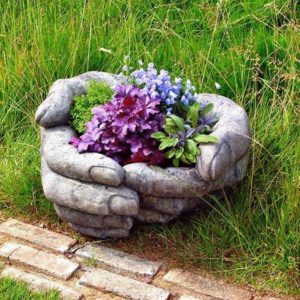
Vegetation – Include trees, bushes, flowers, grasses and vines. Start an organic garden. Well-arranged plants for children can become playhouses, hideouts, castles, and far-off places. Group your plantings to form small rooms, hidey nooks, hollows, and secret spaces. Plantings become wildlife habitats and say “welcome” to birds, chipmunks, butterflies and fuzzy caterpillars. Herb gardens are a good first step. Protect the trees! An existing mature tree, or a gentle hill can be the area’s best natural feature.
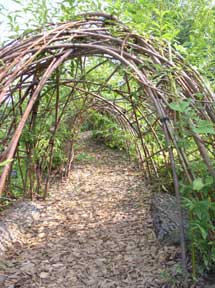
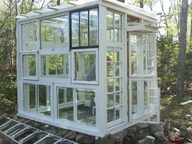
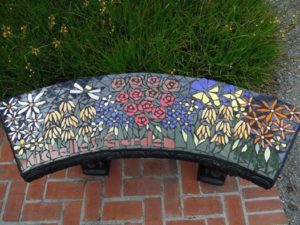
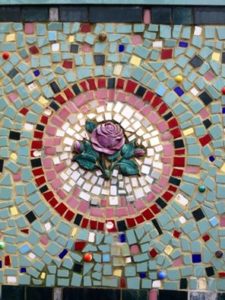
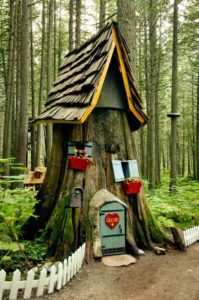
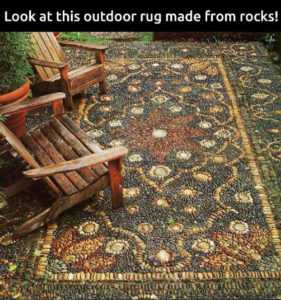
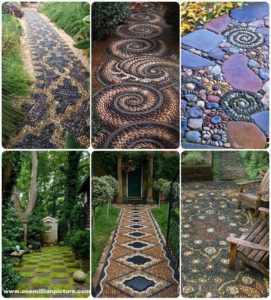
Structures – Create a lean-to, a playhouse, a grotto, a platform, a playhouse, a mini tree house, or a slide embedded in a grassy berm. Provide equipment and materials that can be changed. Add feeders, birdbaths and birdhouses. The birds will thank you and build nests, lay eggs and have babies. Create a mosaic or mural. Make a material wish list.
Sound exploration: add metal, wood and bamboo chimes. Hide tiny bells in bushes and trees that children interact with. Install PVC talk tubes so children can throw their voices to other parts of the play yard. Build giant “thunder drums” out of steel or plastic barrels. Give children sound exploration opportunities that ring and resonate deeply in the body and sound harmonious to the ear. Sound can be an enchanting creator of moods and melodies. Provide a thunder drum, kettledrum, rainmaker, chimes, and a quiet area.
Topography of a play area is important. Bumps, berms, and hills help to create spaces and plateaus to climb to, lookout from and roll down. Build decks on top. Beams, logs and stumps create places to jump from 24 to 36 inches high.
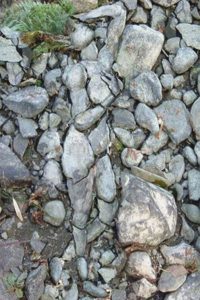
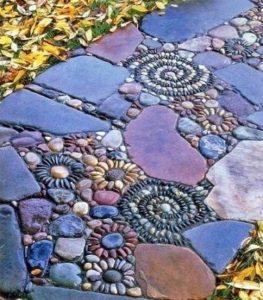
Textures create different moods and a different feel. Children use their bodies in different ways when traveling over different types of materials. Create a secret path from stepping stones, wood chips, bricks, cobble stones, flagstones, log sections, colored gravel, or concrete-molded pavers with fun items stuck into them. Make a “wobbly walk”. Tricycle tracks are extremely important for young children.
Miscellaneous materials for an outdoor classroom: Storage bins, benches, cages, boxes, shelves, hooks, crates, sacks, tricycles, wagons, wheelbarrows, balls, bags, jump ropes, buckets, shovels, sifters, bicycle tires, tubes, tubs, easels, chalk, paint brushes, cartons, blocks, crates planks, sawhorses, rope, duct tape, poles with pulleys and clotheslines, magnifying glasses, compass, measuring tape, jars, rain gauges, food coloring, baking soda, paint, beanbags, balls, stones, blocks, parachutes, shovels, brooms, sand sifters, turkey basters, milk crates, PVC pipes, bells, traffic cones, hoops, cups, bowls, tubs, plastic vases, wood tools, washboards, butterfly nets. Use the Consumer Product Safety Commission Guidelines
- Site Analysis for the Garden Classroom
Read the landscape and develop a garden design that responds to the landscape. An ecological design strives for a balance between the site’s natural history, it’s ecological setting, and human interaction with the area. The collective vision of what the sight can become will transform the school grounds from the ordinary to the extraordinary.
Note existing features: measurements, drainage patterns, existing erosion, amount of sun the area receives (must have 6-8 hours of full sun ), location, distance and availability of water, and soil analysis. Make sure there are no underground electricity, sewer, or water lines. Secure the site with fencing or block any views such as a dumpster or busy road. Does the garden need to be handicap accessible?
Put together a summary of the site conditions for the space, light, and soil available on the sight and find plants with matching requirements. If you are building raised beds then I suggest that you not make them more than 3-4 feet wide so that children can reach plants.
- Purpose of the Garden
The outdoor classroom is an interactive opportunity for students and adults to learn how math, history, literature, art and music are influenced by nature and our natural resources. Who will the garden serve? What kind of garden or gardens do you want to build?
- Herb Garden
- Butterfly Garden
- Tree Garden
- Salad Garden
- Root Garden
- Rain Garden
- Flower Garden
- Rock Garden
- Dye Garden
- Art Garden
- History Garden
- Zoo Garden
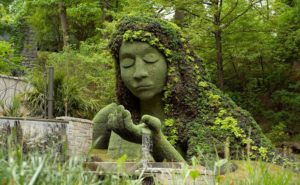
- Sculpture Garden
- Ethnic Garden
- Clock garden
- Vegetable Garden
- Safety of the children means considering access to water, shade for gathering, the enclosure of the garden, a design for optimal sensory experiences, maintenance of the garden and clear boundaries and pathways. Have the group come up with a set of ground rules. Crowding leads to conflict. Paths should be at least 2 feet wide or 5 feet for handicap accessibility. Children should be able to touch anything in the garden. Chose materials wisely and plan for all seasons. Signs should be consistent with the purpose of the garden and the outdoor classroom activities. You may want to include a place for children to eat such as a shaded picnic area.
- The Participatory Process means inviting anyone who might have an interest in the school grounds to give input and participate such as teachers, caretakers, parents, principal, administrators, neighbors and most important students.Reach out to the community and develop partners for materials and support. Student involvement in the initial design and future upkeep are essential to the success of the project. The collective vision of the group will determine the agenda and carry the agenda out. Create a physical plan, a to-do list, a time line and a list of needs.
Suggested Committees needed:
- Funding and resource development
- Youth activities and action projects
- Construction
- Public relations
- Connect to the Curriculum and the school grounds can provide a wealth of learning opportunities. Integrate the development, monitoring, and maintenance of the grounds with what happens in the classroom. The opportunities for engaging students are broad and cross the full range of subject areas. Design activity sites where children can investigate. Plant so that the cycle of life becomes transparent to students. Some schools have taken advantage of this by creating a full time school garden teaching position. A responsive and adaptable design, broad based participation and opportunities to connect to the curriculum and the broader community are the keys to a successful and sustainable school ground initiative.
- Recognize People’s Efforts and expressing appreciation for their support is very important.
Elements of a Sustainable Landscape are:
- Plants that have low water requirements
- Native plants
- Ground areas are not hard to mow
- Healthy soil means healthy plants
- Ground cover or mulch to manage erosion, soil temperature, evaporation, and weeds
- Use of organic methods to prevent and reduce pest problems
- Some Components of an Outdoor Classroom:
Weather Station Compost Bin Worm Bin Labyrinth
Sundial Shaded gathering area Rain Barrel Recycle Bin
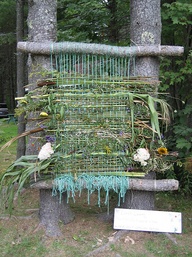
Weaving Loom Trails Tool Shed Bamboo teepee for beans
Willow Hut Activity Centers Fire Pit Outdoor kitchen facilities.
Fossil mound Cereal Maze Arbors Solar Fountain
Bird Baths Bird Feeders Sculpture Wall
Please visit Life lab on the web to see a great program at work and also for support the Cornell University site “Garden Mosaics” and the Brooklyn Children’s Garden are great programs and garden references.
Suggestions for a Zoo Garden:
butterfly bush Catnip butterfly tree Chameleon plant turtlehead Hens and chicks Elephant Ears Bear’s Breach Kangaroo Paw Leopard Flower Tiger Lily Lion’s Tail Ostrich Fern Snakeshead Snapdragon Stickey Monkey Lambs ear Unicorn grass Cattails Horsetail Duckweed Snake plant Spider Lily Shrimp plant
by Susan Dean | Feb 1, 2018 | Self Science
Think Green!

7 Steps to a Green School
- Establish A Green Team or Eco-Committee
The Green Team is the heart of the Green Schools process by organizing and directing activities. Consisting of students, teachers, custodians, facilities managers, parents and school board members. The Green Team is democratic and can be run by the students themselves. Whatever type of school or age group, student involvement in the committee is essential. The group can be responsible for coordinating the greening activities, making recommendations to relevant school decision-makers, and facilitating communication among and actions by the whole school community.
2. Adopt An Environmental Vision Statement or Planet Pledge
Create your own vision statement, setting out what the students and/or school community are striving to achieve. The Environmental Vision Statement is displayed in places within the school and recognized by the students and community as a statement of beliefs and intents. This statement is often in the words of students, and can be an inspiring classroom, art, or school-wide assembly project. Such statements can be accompanied by a resolution from the school board, Parent Teacher Association, the Green Team, or other school bodies.
3. Conduct A School Environmental Survey
Identify priorities for action. Begin by conducting a review of the school’s environmental impact. Students are involved in assessing the level of waste from school lunch, checking the building for inefficiencies such as leaky taps, or electrical equipment left on overnight. The school and the Green Team work with local organizations, businesses, or other resource people during the review. These audits can be fun and help educate the school community about the health and environmental impacts of the school.
4. Create A Green School Action Plan
- Monitor and Evaluate Progress
Use the results of your environmental survey to identify priorities in the key areas where you want to make change and create an action plan. Set realistic and achievable targets to improve environmental performance at the school so kids and adults can take pride in tangible accomplishments in the short term. It is important to set long-term, inspiring and challenging targets to move beyond the status quo and foster greater environmental improvements. The action plan could involve and promote a school recycling program; eco-friendly, non-toxic cleaning materials; carpooling; energy conservation like turning off lights, computer monitors and printers; or a school garden.
The Green Team, students, or other school community members can assist with monitoring and evaluating progress on the priorities in the action plan that can involve conducting an annual environmental audit to monitor levels of waste, recycling, energy use, purchases of environmentally-preferable products, and financial savings and/or costs. Use these ecological footprint tools to ensure that progress towards the goals and targets is made and that the action plan is modified, if necessary. It ensures that environmental education is an on-going process in the school, since students can be responsible for the annual audits. The basic data collected over time can show the waste, pollution, and energy avoided – big motivators for people to continue the efforts.
6. Integrate Greening into the Curriculum
Greening activities can be integrated into existing curricula in science, art, humanities, math, language arts, or electives. Using the school as a hands-on laboratory offers opportunities for real-world problem-solving. Students can undertake study of themes such as energy, water, forests, toxic pollution, and waste. The whole school should be involved in practical initiatives like saving water, recycling materials and saving energy. Outdoor education, and time spent in nature locally is a critical component of a hands-on, place-based, experiential education. Where environmental education is not part of the regular curriculum, recommendations can be made by the Green Team as to how these themes can be incorporated.
7. Inform, Involve, and Celebrate!
Honor, celebrating, and communicating about achievements are critical components of a Green School! Greening programs often unify the whole school and strengthen community relations. Your might consider partnering with external organizations from the community to benefit from their experience and expertise. In some schools, environmental consultants have offered to take part in the environmental review process. Many local government agencies and utilities offer free advice on energy, recycling, and hazardous waste management. Schools should consider the wider community when preparing action plans – for example, schools could offer to be the local recycling point or to be a drop-off for Community Supported Agriculture boxes. Some schools get involved with clean-up or habitat restoration at nearby parks. A communication and publicity program keeps the school and the community informed of progress through classroom displays, school assemblies, newsletters, or other press coverage. Communicating is key to spreading success and inspiring more actions. Annual Earth Day celebrations offer an opportunity to showcase actions taken by the school and bring together the school and wider community.