Self Science

                               “All learning has an emotional base.”   Plato

So many children today grow up in a world of neglect, violence, and despair. Most of America’s youth are at risk. More than half of America’s high school seniors have witnessed violent crimes at school and between three and six children are killed by abuse daily. Our educators are struggling today with little support and few tools to effectively equip students for the climate of trauma and fear.

We have experienced a burst in the scientific study of emotional learning and the functioning of the brain and have a more accurate insight into the processes of learning, feeling, and thinking.

Self-Science is a valuable, effective approach to building a vital set of skills and understandings. The value of Self-Science has been proven in practice and in research. In his bestselling book, Emotional Intelligence, Daniel Goldman calls this program “a model for the teaching of emotional intelligence” as one of the two curricula he recommends.

Self-Science is designed to build emotional intelligence and to develop a learning community that fosters respect, responsibility, and resiliency.

Fundamental skills the program teaches:

Recognize, understand, communicate, and manage feelings.

Recognize and redirect patterns of behavior.

Set goals and move toward them.

Increase respectful communication, thinking, and behaviors.

Results from Implementing the Emotional Intelligence curriculum are:

Higher motivation

More creativity

Higher academic achievement

Greater safety and inclusion and less violence

More accountability

Better relationships

Improved social skills

Increased lifelong success

For teachers, improved EQ skills increase “on task” behaviors and reduce discipline problems

We have not learned how to make quality of life, joy, purpose, and connection a part of our daily lives. Our society is faced with overwhelming problems of poverty, violence, racism, and selfishness.

Children need to be equipped with tools to grow strong despite the negativity that surrounds them. They need strategies to manage themselves and to reshape their society.

Schools cannot replace family, church, or other cultural systems that historically have shaped the integrity and morality of children. Given our current situation schools need to help reinforce the principles that we all share as a society.

The U.S. is the only country on the entire planet that does not have either a religious context for instruction or a values program as a framework/foundation. It is essential that schools support the learning of parental and community values and the universal principles of our society.

The Self-Science curriculum is based on some very simple assumptions:

The more conscious one is of experiencing, the greater the potential for self-knowledge. The more self-knowledge one gains, the more likely it is that one can respond positively to one’s self and others.

These assumptions are based upon a careful and critical study of respected research in the area of affective education. Eclectic in origin, Self-Science draws principally from 30 years of practice along with research on learning and development; Seligman’s studies of optimism; Maslow’s hierarchy of needs; Kelly’s psychology of personal constructs; child personality and development studies; Neuro-Lingusitic Programming; and scientific methods of inquiry.

Emotions are not in the way of learning, but they are the route to learning. Emotions are not peripheral, but they are central to being human. Perhaps most satisfying for educators, emotional skills are learnable.The following is an great website to learn a lot more.

The Emotional Intelligence Network

Six Seconds is a research and practice organization that supports educators who wish to make SEL(social-emotional Learning) part of their school environment. We do this by:

  1. Conducting, supporting, and sharing research  on effective implementation of social emotional learning.
  2. Encouraging effective SEL implementation through  Benchmarks for Social Emotional Learning.
  3. Supporting additional research through Six Seconds’ Grants.
  4. Equipping educators and faculty withcertification training in tools and processes to fully integrate SEL.
  5. Connecting the community of emotional intelligence change makers.

Poetry

Poem dispenser in San Francisco shop


Click on Links to poetry pages: 


Pictures in the Night

Little stars are shining bright,
Forming pictures in the night.
Twinkling and sparkling through the air-
Little Dipper and Little Bear . . .
How many stars will I see?
There are so many picture stories for me!

HOLIDAY SENSES

At holiday time it’s nice to see . . .
A lovely decorated Christmas tree.
At holiday time it’s nice to hear . . .
Jingle bells on flying reindeer.
At holiday time it’s nice to feel . . .
Santa’s beard to see if it’s real.
At holiday time it’s nice to lick . . .
A peppermint candy stick.
At holiday time it’s fun to smell . . .
Gingerbread cookies with icing gel.
Isn’t it great! Isn’t it fine!
To use our five senses at holiday time.


Christmas Crafts

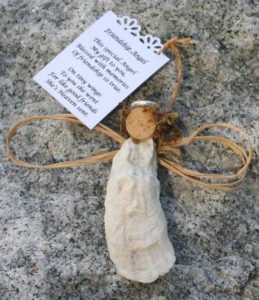
Friendship Angel

This special angel
My gift to you
Blessed with memories
Of friendship so true.

On tiny wings
To you she went
For like good friends
She’s Heaven sent.


Make a Paper Plate Santa

Sewing Cards
Cut out green tree triangles (or bell/ stocking) from poster board
Use hole punch to punch holes around outside and let kids lace with red yarn and tie loop to hang on tree

Heart Tree   Cut out 3 different sizes of green hearts and create a heart tree glueing them together upside down.

We made a dragon one year to celebrate the Chinese new year using painted decorated boxes. We made a paper mache head. Every child was part of the parade dragon!

New Year’s Project Give children black paper and let them make fireworks with colored chalk then spray lightly with hairspray to set chalk so it won’t smear.

Pine Cone Christmas Gnome

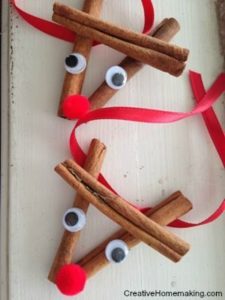
POPSICLE STICK REINDEER

3 popsicle sticks
2 google eyes
1 red pompom
Glue

Glue 2 Popsicle sticks together and make a ‘V’ shape. About 1/3 way from top, glue third popsicle stick horizontally across the others. Glue google eyes under the cross stick and the red pompom at the bottom of the V-shape.

String decorations
Materials:
Balloons, string, glue, glitter
Blow up balloons and tie. Dip strings in glue and wrap around balloon. Spinkle with glitter and let dry. Pop balloon!

Bird Seed Ornaments

4 cups birdseed
3/4 cup flour
1/2 cup water
1 envelope unflavored gelatin
3 tablespoons corn syrup
1 lb lard
Cookie cutters
Cookie sheet
Parchment paper
Cooking spray
2 straws
Twine

In a large bowl, mix together the flour, water, corn syrup and gelatin to form a smooth paste.
Slowly add the birdseed to the paste and combine until the birdseed is fully coated. Melt 1 pound of lard and add to mixture.
Place the cookie cutters on a parchment paper-lined pan and coat the cookie cutters with cooking spray. Spoon the birdseed mixture into the cookie cutters. Press the mixture down firmly with the back on the spoon to pack the mixture into the cookie cutters as tight as possible.
Cut straws into 3-inch segments and press the straw into the top one-fourth of the birdseed-filled cookie cutter. Make sure the hole goes all the way through the mixture. Leave the straw in the ornament and dry for 3 to 4 hours.
Once the birdseed ornaments have dried, take out the straw and carefully remove the ornaments from the cookie cutters. Harden overnight in the freezer.
Run a piece of twine through the hole at the top of the ornament. Hang the completed ornament in a tree for the birds to enjoy.

Melted crayon fireworks
Handprint Ball

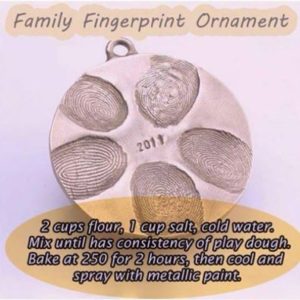
Fingerprint String of Christmas Lights

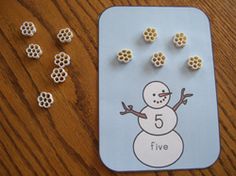
Counting Snowflakes


Tic Tac Toe Tree Box


Tin Bucket, colored balls and aquarium glue.


CD Tree


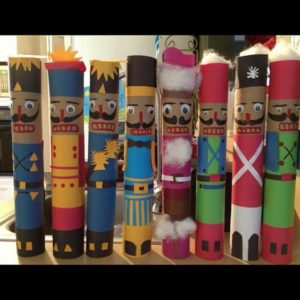
paper towel nutcrackers


Ojo de Dios


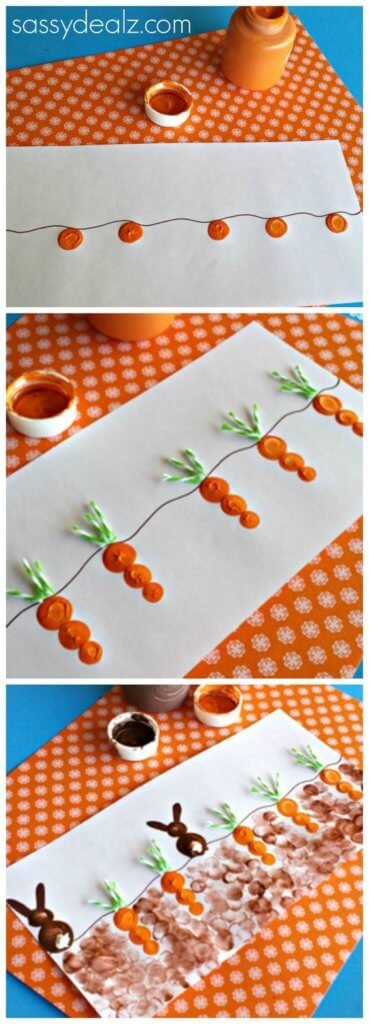
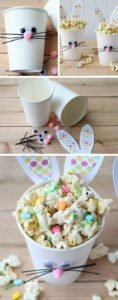
Easter Crafts

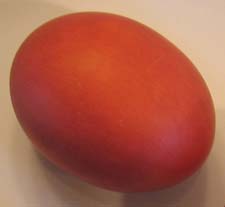
Cultural Note: In Greece, the tradition is to dye the eggs red on Red Thursday – which commemorates the day the Last Supper was eaten. It’s also called Unholy Thursday because that’s when Jesus was betrayed by Judas. The red of the eggs represents the Blood of Christ.


Dying eggs Naturally
For blue, use red cabbage
For red, try whole beets (not canned), cherries, or cranberries
For light green, use spinach or fresh green herbs
For tan, brew strong coffee, tea, or a handful of cumin seeds
For yellow, try turmeric (a spice) and yellow onion skins
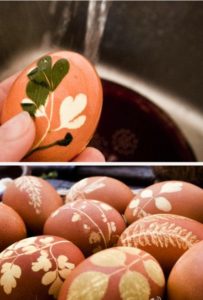
For olive green, use red onion skins
For purple, grape juice or frozen blueberries
Preparing the Dyes Cover the ingredients with water, while making enough dye to cover the eggs. Add white vinegar to set the dye and bring out color – about 3-4 cups water to 1 T. white vinegar. Bring water to a boil and simmer for 30 minutes. If color is still not released add more vinegar and simmer another half hour – careful not to let the water boil off. Gently smash the ingredients with the back of a wooden spoon. When using green leafy vegetables, substitute 1 teaspoon of baking soda for the vinegar. After cooking, strain the colored liquid through a strainer with a coffee filter.
Dying Eggs Naturally GREEN with Spinach – Simmer frozen spinach in water with a little baking soda for about 30 minutes or longer until water is green.

Olive Green
Peels of 5 Red Onions
6 Cups of Water
1 T. Vinegar
Boil 30 Minutes. Let eggs soak in the dye till desired color. Makes wonderful brick red eggs.

Turmeric for Yellow
4 tablespoons Turmeric
3 cups Water
1 T. Vinegar
Boil for 5 minutes and then simmer for 30 minutes. Filter through a coffee filter inside a strainer to get rid of the excess turmeric.

Coloring the Eggs – For a more consistent color on the eggs, hard boil the eggs in advance and prepare the dye separately.
Once dye is ready, put it in a bowl, add the hard-boiled eggs and let soak for five minutes to several hours. The longer they soak, the darker the color. Turn them in the dye occasionally for more consistent color.

Drying the Eggs -Remove eggs from dye bath and let them dry. Be careful for eggs may take on the pattern of whatever surface you rest them on.


            PLANT PRINT EGGS

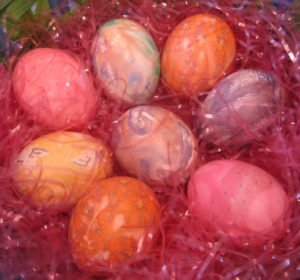
                                                           Silk Tie Easter Eggs

Silk Tie Easter Eggs

Small- to medium-size raw eggs
Glass or enamel pot
Silk ties, blouses, or boxers, cut into pieces large enough to cover an egg
White sheets ( pillowcases or old tablecloths), cut into pieces to cover silk-wrapped eggs
Twist ties
3 tablespoons of white vinegar
Warm water
Vegetable oil
Paper towels
Tongs or spoon

1. Cut silk into a square (or a piece) large enough to wrap around a raw egg.
2. Wrap raw egg with a piece of silk, making sure the printed side of the material is facing the egg. Silk can still be used if it doesn’t fit perfectly around egg.
3. Place the silk-wrapped egg in a piece of white sheet, pillowcase, or old tablecloth and secure tightly with a twist-tie.
4. Place the eggs in an enamel or glass pot filled with water to cover eggs completely. Add three tablespoons of white vinegar.
5. Bring water to a boil, turn heat down, and simmer for 20 minutes (longer if you plan on eating the eggs).
6. Remove eggs from water and let cool.
7. Remove silk from cooled egg.
8. For shiny eggs, wipe with vegetable oil after completing step


Marbelized Eggs To add a marbleized effect, stir in a few teaspoons of vegetable oil into the cooled strained dye. The oil sticks to the shell in places, preventing the dye from coloring the shell in certain spots.

For a relief technique, cover the shell with stickers, tape, stencils, leafs, or flowers before dying them.

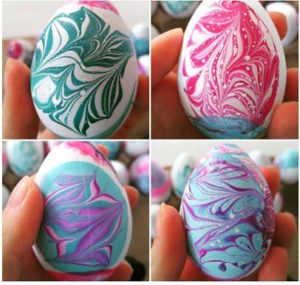
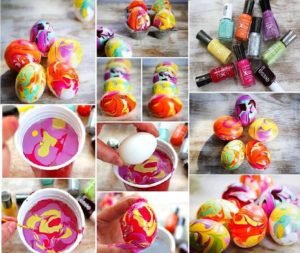
Marble some eggs with nail polish

Eggs. A lot of them.
Nail polish in all kinds of fun shades – silver polish was amazing!
A plastic cup filled with room temperature water. If the water is too cold or too hot, the polish won’t work.
Toothpicks.
Nail polish remover. You’ll need this to get the polish off your fingers when you’re done.
Drop lots of nail polish into the water. If it sinks, the temperature isn’t right. You want it to spread out over the top of the water. Have fun playing with colors! Then take a toothpick and swirl the colors a bit.
Hold your egg between your fingers so that you cover the least amount of surface area on the egg. Then dunk straight down into the water, hold for a second underwater and then bring it up. The polish will cover about half of the egg. Sit the egg in a carton or something and let it dry.

Volcano Eggs

Volcano Egg Dying
hard-boiled eggs
food coloring
vinegar
baking soda
paint brushes
some cups
big lipped plate or bowl
a cup of water
1. Create baking soda paint using a tbsp (or so) of baking soda, couple tsps of water, and some food coloring. Mix it up and experiment until you have the consistency you want.
2. Grab a paint brush and start painting your eggs.
3. Drop some food coloring splashes onto your eggs using a dropper.
4. Pour vinegar on top of the egg and watch the “volcanic eruption” all around your egg (picture the bubbling of a baking soda volcano, but more colorful. Every time is different based on your colorful combinations).
5. Repeat steps 2, 3, and 4 again and again until you get bored and are ready to move on to another egg.
6. Pat off the excess vinegar off lightly or just let them air dry.


Our crayon dyed eggs! Put on crayon design while very warm and then put into dye.

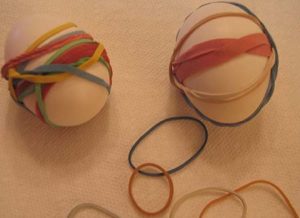
Rubber Bands Wrap eggs with a few rubber bands before dyeing it. To get a few different shads, take the egg out of the dye, remove a few of the rubber bands.


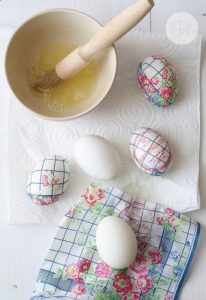
Napkin print eggs.   Cover with napkin and paint with vinegar


Tie-dyed eggs Add a few drops of food coloring to the eggs in a colander and then rinse the eggs with cool water. Shake the eggs gently so the food coloring spills over the sides of the eggs. Add a few drops of a new color to the eggs in the colander. Very gently spread the color all around. Rinse the eggs with cold water. Repeat the process with a third color. After you’ve added the final color, rinse the eggs again. Dry with a paper towel. Place in a container to store and refrigerate.


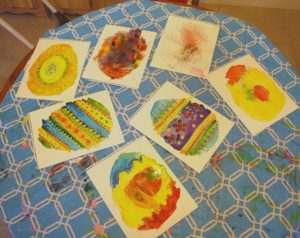
                                                       Painted Eggs

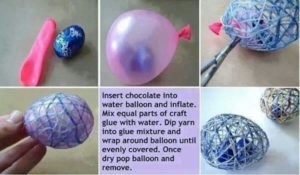
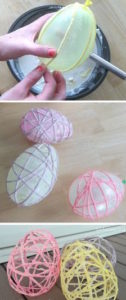
Yarn Dipped Eggs in flour/wheat paste mache mixture with a little
Elmers glue added and wrapped around a balloon.


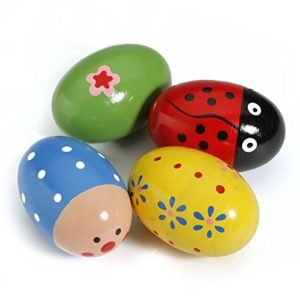
Egg Shakers

Egg Garland

Valentine Crafts