by Susan Dean | Feb 1, 2018 | Gardening
Steps for Making a Straw Bale Garden
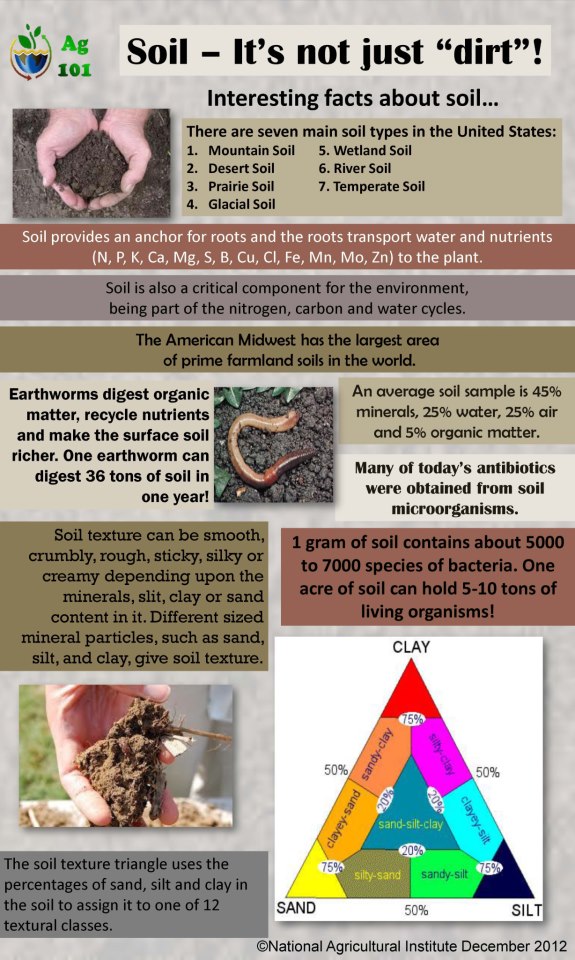
Straw Bale Selection
Selected a bale of wheat straw, but oat and alfalfa will work. Hay has seeds and the seeds may sprout. Pine straw won’t work because it sheds water and is slow to break down. A bale bound with synthetic twine is ideal because it won’t rot. If the synthetic twine isn’t available, give the bales extra support with wooden stakes.
Arranging the Bales
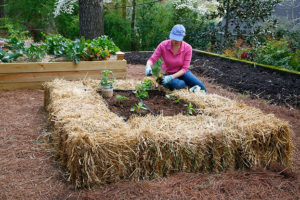
Use as many bales as your space allows. Even a single bale can be productive. Arrange them end to end in a line or side to side making a square. If the bales are placed with the straw standing vertical, they are easier to plant. The bales will be heavy once you begin the curing process, so place them where you want them before you get started.
Curing the Bale
This step breaks down the interior of the bale to create a soil-like environment, composting the inside. This process takes 3 to 4 weeks if you use an organic source of nitrogen
Step One – Soaking the Bale
Soak the bale with water and keep it wet for 3 days. It will heat up as it begins to compost.
Applying Fertilizer
After 3 days sprinkle the bale with blood meal, fish emulsion, compost tea or another organic, high nitrogen product and water it in thoroughly to facilitate the decomposition. Use fish emulsion, undiluted, and pour about 2 cups evenly over the top of the bale and then water it in.
Cool Down
Composting inside the bale really heats things up. The temperature needs to come down before you can plant. Keep the soil moist and re-apply your organic nitrogen periodically until you can feel that the bale has cooled off. This should take about 2 to 3 weeks.
Topping with Compost
Once the bale is cool you are ready to plant. A two or three inch layer of compost or potting soil on top of the straw bale will help keep your plants moist until they become established. This is especially helpful for sowing seeds.
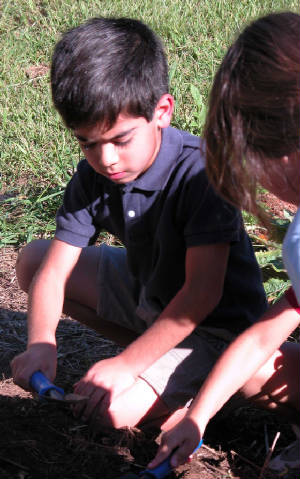
Planting
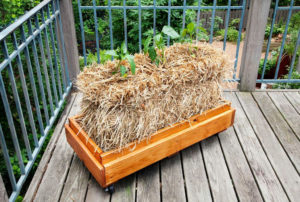
The number of plants per bale depends on the size of the mature plant. Four small vegetables, such as peppers, per bale will work and for large plants like tomatoes, plant two per bale. Vines are particularly suited to straw bale culture, as the bales keep the plants away from ground dwelling pests. For most spreading vegetables, such as squash and cucumbers, each bale can hold two plants. More plants will fit when using smaller plants like greens or herbs. Avoid root crops, and if you grow tall crops, such as corn or pole beans, be sure and use a support system such as staking the bale.
Smaller plants are easier to transplant into bales, so go for younger seedlings that you plant in regular soil.
Use a trowel to pry apart a planting crevice in the bale for garden transplants or you cut quart-sized holes in the bales themselves with a keyhole saw and fill those with a mix of compost and soil.
Fertilizing and Water
Unlike traditional gardening, your plants will be getting next to no nutrients other than what you add to the straw. Fertilize with a liquid, organic fertilizer at half strength with each watering and sprinkle and water in mineral powders such as bone meal or rock phosphate and greensand to add nutrients. Keep the bales moist throughout the growing season and keep an eye on your plants to make sure that they don’t dry out between watering.
After the Growing Season
You should be able to use your wheat straw bales for two years. After that you can compost them, or just break them up where they sit and put new bales over them. This will enrich the soil below and encourage worms to come in and improve it.

Making a Straw Bale
Choose A Sunny Spot since once the bale is wet, it’ll grow heavier to move. Put a piece of cardboard underneath to keep grass and weeds from growing into the bale. Position the bale so the side of cut straw ends is facing up.
Condition the bale before you plant. This process will take around 10 to 14 days. For the first 3 days, water the bale thoroughly so it stays damp. For the next 6 days, in addition to watering the bale, use a liquid fertilizer to add nitrogen to speed the decomposition. Simply add a capful to a gallon of water and pour it all on the bale.
As the bale goes through the conditioning process, the internal temperature may rise to 120 degrees or higher.
On day 10, return to simply watering the bale, and continue doing that until the temperature inside the bale starts to reflect the temperature outside. Use a compost or meat thermometer to keep tabs; you’ll see the temperature start to rise after the first day or two, spike about midway through the process, then start to come back down. Once it reaches ambient temperature, the bale is ready to be planted.
You can grow just about anything in a bale that you can in the ground — with a few exceptions like plants that get too tall and heavy, and can start to break the bale apart. Running plants like sweet potatoes can be harder to grow in a bale. Space plants the same as you would in the ground.
Planting The Bale
Remove straw to form a hole that is as deep as root ball of your plant (though if you’re planting a tomato, of course, you’ll want to go deeper.) Place the plant in the hole, add some quality potting soil around it for extra nutrients and stability, and fill the hole in with some of the straw you removed. Water well. Water And Fertilize plants regularly. Your plants will receive less nutrition from the bale than they would from soil, so fertilize them every week or two. Make sure the bale doesn’t dry out.
by Susan Dean | Feb 1, 2018 | Gardening

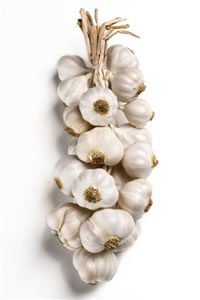
Garlic is planted in the fall and tolerates some shade but prefers full sun. It responds best in well-drained, rich, loamy soil amended with lots of organic matter. Raised beds are ideal, except in very dry regions.
Plant the cloves, the sections of the bulb; each clove will produce a new bulb. The largest cloves generally yield the biggest bulbs. To get cloves off to a strong start and protect them from fungal diseases, soak them in a jar of water containing one heaping tablespoon of baking soda and a tablespoon of liquid seaweed for a few hours before planting. Plant garlic in the fall.
Place cloves in a hole with the pointed end up, with each tip 2 inches beneath the soil. Set about 6 to 8 inches apart. Top the soil with 6 inches of mulch. Leave the mulch in place into spring to conserves moisture and suppresses weeds (garlic competes poorly with weeds).
Garlic needs about an inch of water each week during spring growth. If you augment rainfall with the garden hose, stop watering by June 1 or when the leaves begin to yellow in order to let the bulbs firm up.
By mid-June garlic will begin sprouting flowery tops that straighten out into long spiky tendrils. These savory stalks, known as scapes, should be removed to encourage more efficient bulb growth. Before adding scapes to the compost pile, try incorporating their mild garlic flavor into a delicious scape pesto, scape dip, or scape soup.
Start foliar-feeding your garlic every two weeks as soon as leaf growth begins in spring (typically March) and continue until around May 15. Use 1 tablespoon of liquid seaweed mix and 1 tablespoon fish emulsion mixed into a gallon of water.
When half to three-quarters of the leaves turn yellow-brown, it’s harvest time. Carefully dig up each bulb.
Tie garlic together in bundles of 6 to 10 bulbs and hang them to cure for about four to six weeks in a shaded, dry, and drafty area.
When thoroughly dry, trim the roots, taking care not to knock off the outer skin. Cut off the stalks about 1½ inches above the bulb if you plan to keep the garlic in bags. Recycled mesh onion bags are perfect for storage.
A whole head of garlic a day does miracles for your body. It stimulates the immune system and normalizes your gut flora. Garlic is a powerful natural antibiotic and kills a large number of different bacteria. Eating garlic on an empty stomach is effective in preventing and treating many diseases. When you consume garlic on an empty stomach increases its power as an antibiotic.


by Susan Dean | Feb 1, 2018 | Gardening

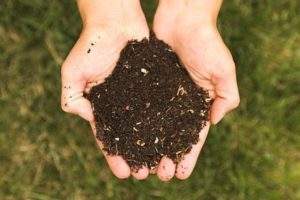
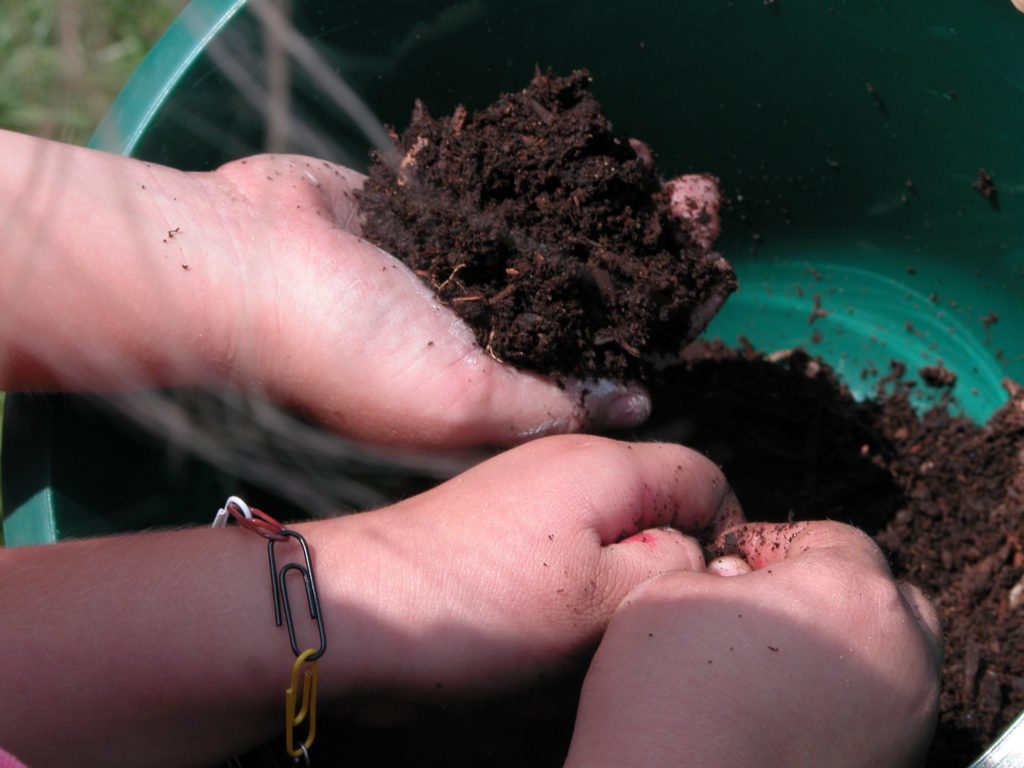
SOIL – The benefits of high organic content in soil: Increased supply of oxygen available to plant rootsEnrichment of the micro-flora and fauna of the soil Increased microorganisms that improve plant nutrition Increased supply of raw material for earthworms Improved retention of water and nutrients Nutrient take-up is associated with the activity of microbes. Even in our own take up of nutrients! Ex. Legumes with Ryzobium bacteria make nitrogen for plants and the microbes in our digestive system help us digest our food too!
The earthworm aerates the soil, improves structure, and helps release nutrients into soil. Earthworm populations are declining and disappearing as more chemical fertilizers are used. Heavy clay soils get very hard and dry and are not a growing ground for tiny tender baby plant! Sandy soils don’t hold water so find out what your plant likes. Plants are as diverse, peculiar, and colorful as people! Some don’t even like being close to each other! A healthy ecological balance in the soil was the food of evolution. Nature not only sustains itself . . .but us as well. If we put poison into it, it feeds us poison!
Soil Structure & Tilth – When the soil is not too wet nor too dry, dig a hole 6 to 10 inches deep. Separate an intact piece of the soil to determine if it is cloddy, powdery, or granular. Break the soil apart with your fingers. The soil should hold its shape under slight pressure. If there are clumps that break apart with difficulty the soil is too hard. Soil rich in organic matter forms relatively round aggregates that create an open, porous soil that allows free movement of water and oxygen so plants develop strong, healthy roots. Compaction Plunge a wire flag vertically into the soil at different locations. Mark the depth at which the wire bends. The sooner it bends, the more compacted the soil. A foot or more of easily penetrable soil is ideal.
Compacted soil inhibits root growth and water availability, and keeps earthworms and other vital soil fauna from circulating freely. Workability If tilling or digging the soil produces cloddy clumps, the workability is low. You can judge by the effort necessary to prepare beds for planting. Soil that’s easy to work is less prone to compaction. Fail this step, and your garden will likely show disappointing results for many of the other tests.
Soil Organisms – Measure animal life in your soil by digging 6 inches and peering into the hole for 4 minutes. If you count less than 10, your soil does not have enough active players in the food chain. A thriving population of fungi, bacteria, insects, and invertebrates is one of the most visible signs of soil quality. There is less opportunity for pests and disease. Soil life does its part to break down plant residue and make nutrients available for plant growth.
Earthworms Dig – 6 inches of soil and count the number of earthworms on the shovel. Three worms are good; five are better. The absence of worms means the soil doesn’t have enough of the organic matter they feed on. Earthworms aerate the soil and their casts infuse the soil with enzymes, bacteria, organic matter, and plant nutrients. They increase water infiltration and secrete compounds that bind soil particles together for better tilth.
Plant Residue – The range of organic material is important to notice here. The presence of recognizable plant parts as well as plant fibers and darkly colored humus indicates an ideal rate of decomposition. The single most important component of healthy soil is organic matter Plant Vigor Look for healthy plant color and size that’s relatively uniform. Overall health and development must be judged for what’s considered normal for your region. Plant vigor indicates soil with good structure and tilth, a well-regulated water supply, and a diverse population of organisms.
Root Development – Dig gently around a selected plant and check the extent of root development, searching for fine strands with a white healthy appearance. Brown, mushy roots indicate drainage problems. Stunted roots might indicate disease or the presence of root-gnawing pests. Without air, water, biological activity, and crumbly soil to grow in, roots can’t do their job.
Water Infiltration – Take an empty coffee can with the bottom removed and push it into the soil until 3 inches remains above the surface. Fill the can with water, marking the water height, and then time how long it takes for the water to be absorbed into the soil Anything slower than 1/2 to 1 inch per hour is an indication of compacted soil. Good infiltration gets water to plants where they need it—at their roots—prevents runoff and erosion, and lets air move more efficiently into soil pores.
Water Availability – The basic lesson is that if plants require more frequent watering than typical for your region, your soil is probably the culprit. Porous soil can better resist evaporation and adequately supply plants between watering. 
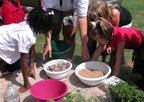
Make a soil shake for the classroom.

by Susan Dean | Feb 1, 2018 | Gardening
BLACK GOLD
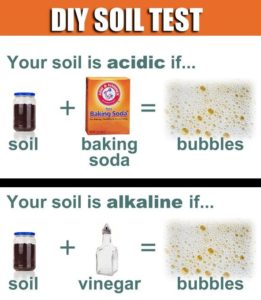
Soil PH
PH is a measure of how acidic or alkaline a substance is, and soil acidity or alkalinity (soil pH) influences how plants take up nutrients. Most plants tolerate a fairly wide range of soil pH. Plant roots absorb mineral nutrients such as nitrogen and iron when they are dissolved in water. If the soil solution is too acid or alkaline, some nutrients won’t dissolve easily and won’t be available for uptake by roots. Most nutrients dissolve easily when the pH of the soil ranges from 6.0 to 7.5. Below pH 6.0 some nutrients (nitrogen, phosphorus, and potassium) are less available. When the pH exceeds 7.5 iron, manganese, and phosphorus are less available.
Many environmental factors (amount of rainfall, vegetation type, and temperature) can affect soil pH. Generally areas with heavy rainfall and forest cover have moderately acid soils. Soils in regions with light rainfall and prairie cover tend to be near neutral. Droughty areas tend to have alkaline soils. The pH of cultivated and developed soils often differs from that of native soil, because during the construction of homes and buildings, topsoil is removed and may be replaced by a different type of soil.
Most plants grow well in slightly acid to neutral soil (pH 6.0–7.0). Exceptions include blueberries, potatoes, azaleas, and rhododendrons, which prefer moderately acid soil. Adding organic material to soil buffers the pH and brings soils closer to neutral.
You can test soil pH with a home soil test kit or portable pH meter (inexpensive and easy). A soil lab report contains recommendations on types and quantities of amendments to use. Your best option is to add organic matter and grow plants that do well in alkaline soils.
Soils with a pH higher than 7.0 are alkaline, or “sweet.” Most garden plants tolerate a pH up to about 7.5. Alkaline soils are generally composed of basic (high pH) materials such as limestone. Soil pH affects nutrient availability for plants, and in soils with a pH over 7.8, iron, zinc, and phosphorus deficiencies are common.
Lowering soil pH is a challenging process because limestone in the soil continually dissolves. To lower soil pH apply pure sulfur or flowers of sulfur. Add organic matter, such as compost or composted manure to your soil annually and mulch with acidic organic mulches, like pine needles. Adding organic matter slowly lowers your pH while increasing microbial life and improving the structure of your soil.

Learning About the Textures and Colors of Different Soils. Kids had clay, sand, and loam to examine and feel.

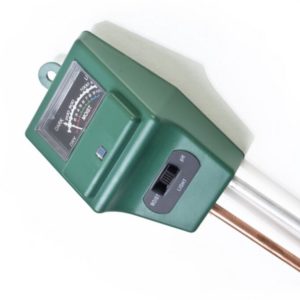
PH Tester
by Susan Dean | Feb 1, 2018 | Gardening
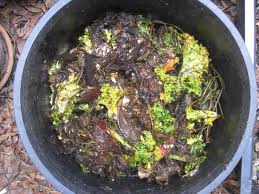
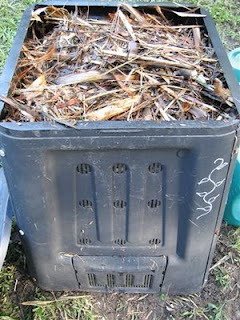
Making a Worm Bucket for Your Garden
Get a plastic 5 gallon bucket with a lid. These are cheap at most home centers.
Cut the bottom out of your bucket, and, if you have a large drill bit, drill several 3/4″ to 1″ holes all around the bottom quarter of your bucket. Doing these two things allows your worms to come and go as they please — which is exactly what you want. If you aren’t able to drill holes, it will still work, so don’t let that stop you.
Place your bucket in your garden bed, sinking the bottom quarter of it down into the soil. Now you can start filling the bucket with kitchen scraps, coffee grounds, tea bags, crumble egg shells, shredded newspaper — anything you’d add to a traditional worm bin. Put the lid on, and you’re done.
At a Worm Farm, a Bucket Bin, and a Worm Bin!

A worm farm covered in secure recycled fly screen doors that will keep everything out. Mice eat worms and can eat through shadecloth, but they can’t eat through metal fly screen.

A worm bucket
A worm farm covered in secure recycled fly screen doors. They will keep everything out. Mice love to eat worms and can easily eat through shadecloth, but they can’t eat through metal fly screen!
Worm Farming
A worm farm is a busy place packed full of microbial life of which the worm is the top of the food chain.
Worms eat microbes, they don’t eat the food you put in there. If worms ate vegetables they would crawl out of the soil in your vegie garden every night and eat it!
Worms live underground and no leafy lettuces are there! There are plant roots and worms will eat them as they break down in the soil, but they mainly feed on microbes. If you can get that concept you can go a long way to trouble shooting a lot of common problems. Worms eat the microbes that are invisible to the human eye but are responsible for most of the decomposition process.
The bottom of the soil food chain is bacteria. Bacteria are the most common thing you’ll find in a worm farm and just like a healthy gut, your soil (and compost systems and worm farms) all need bacteria in there to remain healthy.
Next up are fungi, then algae, protozoa, nematodes (of which 80% are beneficial in the soil), and a whole world of microbes.
Then we have the creatures we can see. These are the arthropods – spiders, beetles etc. you’ll find on healthy soil when you pull the mulch back. Healthy soil will be alive and jumping with little creatures running over the surface. All these creatures eat each other. They all live, breed, excrete, eat and die in the soil and become part of the soil.
This all happens within your worm farms and compost systems. Bacteria are the bottom of the food chain and they begin the work of turning your putrescible waste into soil. Worms are the top of the soil food chain. So a healthy worm farm will have all sorts of creatures in it.
Keeping your farm healthy means keeping the food turning over quickly, getting it all consumed by the microbes before it goes ‘putrid’. The term putrescible waste refers to the kitchen scraps and such we send to landfill that convert to methane gas when they go putrid.
To keep the food turning over and being broken down quickly by the microbes (who will in turn be eaten by your worms) is a bit of a balancing act.
Getting the amounts right is a matter of keeping an eye on things. Worms are a little picky. There are definite likes and dislikes.
If you have overfed and the food is going slimy and foul smelling (which may in turn cause an explosion of one type of microbe – maybe mites – over all the others) remove the food and put it in the compost bin and cover with soil or some type of carbon layer. Then add a smaller amount of new fresh food to your worm farm. Mites do not harm the worms and also compost. They help to break down the fibrous materials. If present in large proportions – leave the lid off the farm and expose the surface of the bedding to sunlight. Food should be being consumed and turned into castings before it goes putrid.
‘Bacterialise’ it. This means putting something over the top of it to make it extra nasty for microbes. Liquid from the worm farm is a good bacterialiser, as is diluted kelp or diluted molasses. Very weak solutions of molasses, kelp or liquid worm castings will attract the bacteria and as they are at the bottom of the food chain all the rest will follow.
Chop the food up finely. This increases its surface area, starts breaking it down and helps the microbes get through it quicker.
If the farm gets too wet, leave the lid off for a little while and let it dry out a bit. Too much moisture may cause an explosion of one type of microbe over the others. It should be pretty balanced in there.
Castings should have the feel of a kitchen sponge that has been wet then well rung out – damp, but not wet.
When the worm farm is operating successfully and you notice pests like mites, vinegar flies, maggots or slugs just dust the top with a little lime. Check to make sure you haven’t added too much food.