by Susan Dean | Feb 1, 2018 | Gardening

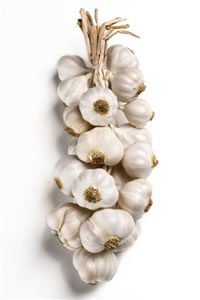
Garlic is planted in the fall and tolerates some shade but prefers full sun. It responds best in well-drained, rich, loamy soil amended with lots of organic matter. Raised beds are ideal, except in very dry regions.
Plant the cloves, the sections of the bulb; each clove will produce a new bulb. The largest cloves generally yield the biggest bulbs. To get cloves off to a strong start and protect them from fungal diseases, soak them in a jar of water containing one heaping tablespoon of baking soda and a tablespoon of liquid seaweed for a few hours before planting. Plant garlic in the fall.
Place cloves in a hole with the pointed end up, with each tip 2 inches beneath the soil. Set about 6 to 8 inches apart. Top the soil with 6 inches of mulch. Leave the mulch in place into spring to conserves moisture and suppresses weeds (garlic competes poorly with weeds).
Garlic needs about an inch of water each week during spring growth. If you augment rainfall with the garden hose, stop watering by June 1 or when the leaves begin to yellow in order to let the bulbs firm up.
By mid-June garlic will begin sprouting flowery tops that straighten out into long spiky tendrils. These savory stalks, known as scapes, should be removed to encourage more efficient bulb growth. Before adding scapes to the compost pile, try incorporating their mild garlic flavor into a delicious scape pesto, scape dip, or scape soup.
Start foliar-feeding your garlic every two weeks as soon as leaf growth begins in spring (typically March) and continue until around May 15. Use 1 tablespoon of liquid seaweed mix and 1 tablespoon fish emulsion mixed into a gallon of water.
When half to three-quarters of the leaves turn yellow-brown, it’s harvest time. Carefully dig up each bulb.
Tie garlic together in bundles of 6 to 10 bulbs and hang them to cure for about four to six weeks in a shaded, dry, and drafty area.
When thoroughly dry, trim the roots, taking care not to knock off the outer skin. Cut off the stalks about 1½ inches above the bulb if you plan to keep the garlic in bags. Recycled mesh onion bags are perfect for storage.
A whole head of garlic a day does miracles for your body. It stimulates the immune system and normalizes your gut flora. Garlic is a powerful natural antibiotic and kills a large number of different bacteria. Eating garlic on an empty stomach is effective in preventing and treating many diseases. When you consume garlic on an empty stomach increases its power as an antibiotic.


by Susan Dean | Feb 1, 2018 | Gardening

SOIL – The benefits of high organic content in soil: Increased supply of oxygen available to plant rootsEnrichment of the micro-flora and fauna of the soil Increased microorganisms that improve plant nutrition Increased supply of raw material for earthworms Improved retention of water and nutrients Nutrient take-up is associated with the activity of microbes. Even in our own take up of nutrients! Ex. Legumes with Ryzobium bacteria make nitrogen for plants and the microbes in our digestive system help us digest our food too!
The earthworm aerates the soil, improves structure, and helps release nutrients into soil. Earthworm populations are declining and disappearing as more chemical fertilizers are used. Heavy clay soils get very hard and dry and are not a growing ground for tiny tender baby plant! Sandy soils don’t hold water so find out what your plant likes. Plants are as diverse, peculiar, and colorful as people! Some don’t even like being close to each other! A healthy ecological balance in the soil was the food of evolution. Nature not only sustains itself . . .but us as well. If we put poison into it, it feeds us poison!
Soil Structure & Tilth – When the soil is not too wet nor too dry, dig a hole 6 to 10 inches deep. Separate an intact piece of the soil to determine if it is cloddy, powdery, or granular. Break the soil apart with your fingers. The soil should hold its shape under slight pressure. If there are clumps that break apart with difficulty the soil is too hard. Soil rich in organic matter forms relatively round aggregates that create an open, porous soil that allows free movement of water and oxygen so plants develop strong, healthy roots. Compaction Plunge a wire flag vertically into the soil at different locations. Mark the depth at which the wire bends. The sooner it bends, the more compacted the soil. A foot or more of easily penetrable soil is ideal.
Compacted soil inhibits root growth and water availability, and keeps earthworms and other vital soil fauna from circulating freely. Workability If tilling or digging the soil produces cloddy clumps, the workability is low. You can judge by the effort necessary to prepare beds for planting. Soil that’s easy to work is less prone to compaction. Fail this step, and your garden will likely show disappointing results for many of the other tests.
Soil Organisms – Measure animal life in your soil by digging 6 inches and peering into the hole for 4 minutes. If you count less than 10, your soil does not have enough active players in the food chain. A thriving population of fungi, bacteria, insects, and invertebrates is one of the most visible signs of soil quality. There is less opportunity for pests and disease. Soil life does its part to break down plant residue and make nutrients available for plant growth.
Earthworms Dig – 6 inches of soil and count the number of earthworms on the shovel. Three worms are good; five are better. The absence of worms means the soil doesn’t have enough of the organic matter they feed on. Earthworms aerate the soil and their casts infuse the soil with enzymes, bacteria, organic matter, and plant nutrients. They increase water infiltration and secrete compounds that bind soil particles together for better tilth.
Plant Residue – The range of organic material is important to notice here. The presence of recognizable plant parts as well as plant fibers and darkly colored humus indicates an ideal rate of decomposition. The single most important component of healthy soil is organic matter Plant Vigor Look for healthy plant color and size that’s relatively uniform. Overall health and development must be judged for what’s considered normal for your region. Plant vigor indicates soil with good structure and tilth, a well-regulated water supply, and a diverse population of organisms.
Root Development – Dig gently around a selected plant and check the extent of root development, searching for fine strands with a white healthy appearance. Brown, mushy roots indicate drainage problems. Stunted roots might indicate disease or the presence of root-gnawing pests. Without air, water, biological activity, and crumbly soil to grow in, roots can’t do their job.
Water Infiltration – Take an empty coffee can with the bottom removed and push it into the soil until 3 inches remains above the surface. Fill the can with water, marking the water height, and then time how long it takes for the water to be absorbed into the soil Anything slower than 1/2 to 1 inch per hour is an indication of compacted soil. Good infiltration gets water to plants where they need it—at their roots—prevents runoff and erosion, and lets air move more efficiently into soil pores.
Water Availability – The basic lesson is that if plants require more frequent watering than typical for your region, your soil is probably the culprit. Porous soil can better resist evaporation and adequately supply plants between watering. 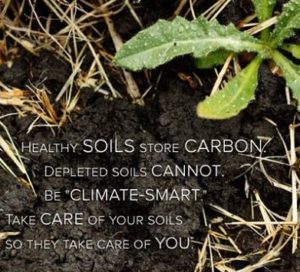
Make a soil shake for the classroom.

by Susan Dean | Feb 1, 2018 | Gardening
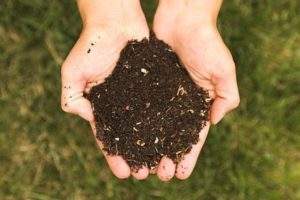
BLACK GOLD
Soil PH
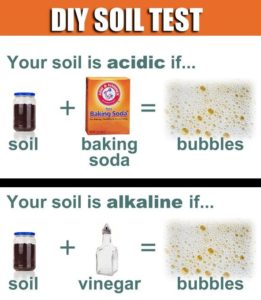
PH is a measure of how acidic or alkaline a substance is, and soil acidity or alkalinity (soil pH) influences how plants take up nutrients. Most plants tolerate a fairly wide range of soil pH. Plant roots absorb mineral nutrients such as nitrogen and iron when they are dissolved in water. If the soil solution is too acid or alkaline, some nutrients won’t dissolve easily and won’t be available for uptake by roots. Most nutrients dissolve easily when the pH of the soil ranges from 6.0 to 7.5. Below pH 6.0 some nutrients (nitrogen, phosphorus, and potassium) are less available. When the pH exceeds 7.5 iron, manganese, and phosphorus are less available.
Many environmental factors (amount of rainfall, vegetation type, and temperature) can affect soil pH. Generally areas with heavy rainfall and forest cover have moderately acid soils. Soils in regions with light rainfall and prairie cover tend to be near neutral. Droughty areas tend to have alkaline soils. The pH of cultivated and developed soils often differs from that of native soil, because during the construction of homes and buildings, topsoil is removed and may be replaced by a different type of soil.
Most plants grow well in slightly acid to neutral soil (pH 6.0–7.0). Exceptions include blueberries, potatoes, azaleas, and rhododendrons, which prefer moderately acid soil. Adding organic material to soil buffers the pH and brings soils closer to neutral.
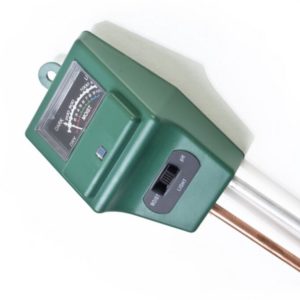
You can test soil pH with a home soil test kit or portable pH meter (inexpensive and easy). A soil lab report contains recommendations on types and quantities of amendments to use. Your best option is to add organic matter and grow plants that do well in alkaline soils.
Soils with a pH higher than 7.0 are alkaline, or “sweet.” Most garden plants tolerate a pH up to about 7.5. Alkaline soils are generally composed of basic (high pH) materials such as limestone. Soil pH affects nutrient availability for plants, and in soils with a pH over 7.8, iron, zinc, and phosphorus deficiencies are common.
Lowering soil pH is a challenging process because limestone in the soil continually dissolves. To lower soil pH apply pure sulfur or flowers of sulfur. Add organic matter, such as compost or composted manure to your soil annually and mulch with acidic organic mulches, like pine needles. Adding organic matter slowly lowers your pH while increasing microbial life and improving the structure of your soil.

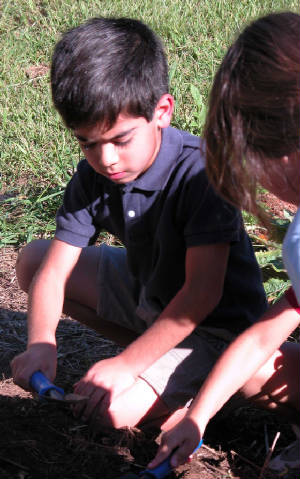
Learning About the Textures and Colors of Different Soils. Kids had clay, sand, and loam to examine and feel.

PH Tester
by Susan Dean | Feb 1, 2018 | Gardening
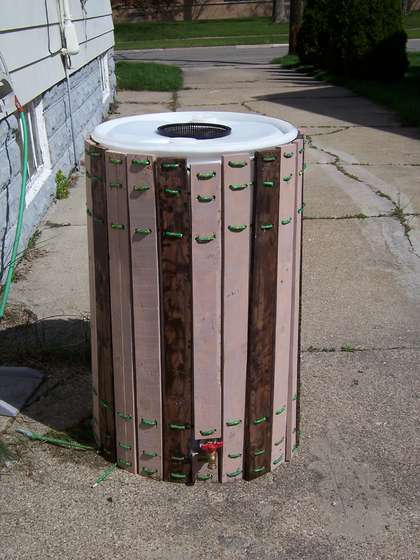
Making a Worm Bucket for Your Garden
Get a plastic 5 gallon bucket with a lid. These are cheap at most home centers.
Cut the bottom out of your bucket, and, if you have a large drill bit, drill several 3/4″ to 1″ holes all around the bottom quarter of your bucket. Doing these two things allows your worms to come and go as they please — which is exactly what you want. If you aren’t able to drill holes, it will still work, so don’t let that stop you.
Place your bucket in your garden bed, sinking the bottom quarter of it down into the soil. Now you can start filling the bucket with kitchen scraps, coffee grounds, tea bags, crumble egg shells, shredded newspaper — anything you’d add to a traditional worm bin. Put the lid on, and you’re done.
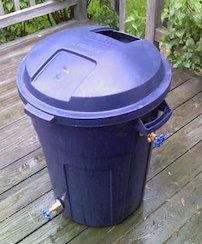
At a Worm Farm, a Bucket Bin, and a Worm Bin!

A worm farm covered in secure recycled fly screen doors that will keep everything out. Mice eat worms and can eat through shadecloth, but they can’t eat through metal fly screen.

A worm bucket
A worm farm covered in secure recycled fly screen doors. They will keep everything out. Mice love to eat worms and can easily eat through shadecloth, but they can’t eat through metal fly screen!
Worm Farming
A worm farm is a busy place packed full of microbial life of which the worm is the top of the food chain.
Worms eat microbes, they don’t eat the food you put in there. If worms ate vegetables they would crawl out of the soil in your vegie garden every night and eat it!
Worms live underground and no leafy lettuces are there! There are plant roots and worms will eat them as they break down in the soil, but they mainly feed on microbes. If you can get that concept you can go a long way to trouble shooting a lot of common problems. Worms eat the microbes that are invisible to the human eye but are responsible for most of the decomposition process.
The bottom of the soil food chain is bacteria. Bacteria are the most common thing you’ll find in a worm farm and just like a healthy gut, your soil (and compost systems and worm farms) all need bacteria in there to remain healthy.
Next up are fungi, then algae, protozoa, nematodes (of which 80% are beneficial in the soil), and a whole world of microbes.
Then we have the creatures we can see. These are the arthropods – spiders, beetles etc. you’ll find on healthy soil when you pull the mulch back. Healthy soil will be alive and jumping with little creatures running over the surface. All these creatures eat each other. They all live, breed, excrete, eat and die in the soil and become part of the soil.
This all happens within your worm farms and compost systems. Bacteria are the bottom of the food chain and they begin the work of turning your putrescible waste into soil. Worms are the top of the soil food chain. So a healthy worm farm will have all sorts of creatures in it.
Keeping your farm healthy means keeping the food turning over quickly, getting it all consumed by the microbes before it goes ‘putrid’. The term putrescible waste refers to the kitchen scraps and such we send to landfill that convert to methane gas when they go putrid.
To keep the food turning over and being broken down quickly by the microbes (who will in turn be eaten by your worms) is a bit of a balancing act.
Getting the amounts right is a matter of keeping an eye on things. Worms are a little picky. There are definite likes and dislikes.
If you have overfed and the food is going slimy and foul smelling (which may in turn cause an explosion of one type of microbe – maybe mites – over all the others) remove the food and put it in the compost bin and cover with soil or some type of carbon layer. Then add a smaller amount of new fresh food to your worm farm. Mites do not harm the worms and also compost. They help to break down the fibrous materials. If present in large proportions – leave the lid off the farm and expose the surface of the bedding to sunlight. Food should be being consumed and turned into castings before it goes putrid.
‘Bacterialise’ it. This means putting something over the top of it to make it extra nasty for microbes. Liquid from the worm farm is a good bacterialiser, as is diluted kelp or diluted molasses. Very weak solutions of molasses, kelp or liquid worm castings will attract the bacteria and as they are at the bottom of the food chain all the rest will follow.
Chop the food up finely. This increases its surface area, starts breaking it down and helps the microbes get through it quicker.
If the farm gets too wet, leave the lid off for a little while and let it dry out a bit. Too much moisture may cause an explosion of one type of microbe over the others. It should be pretty balanced in there.
Castings should have the feel of a kitchen sponge that has been wet then well rung out – damp, but not wet.
When the worm farm is operating successfully and you notice pests like mites, vinegar flies, maggots or slugs just dust the top with a little lime. Check to make sure you haven’t added too much food.
by Susan Dean | Feb 1, 2018 | Gardening
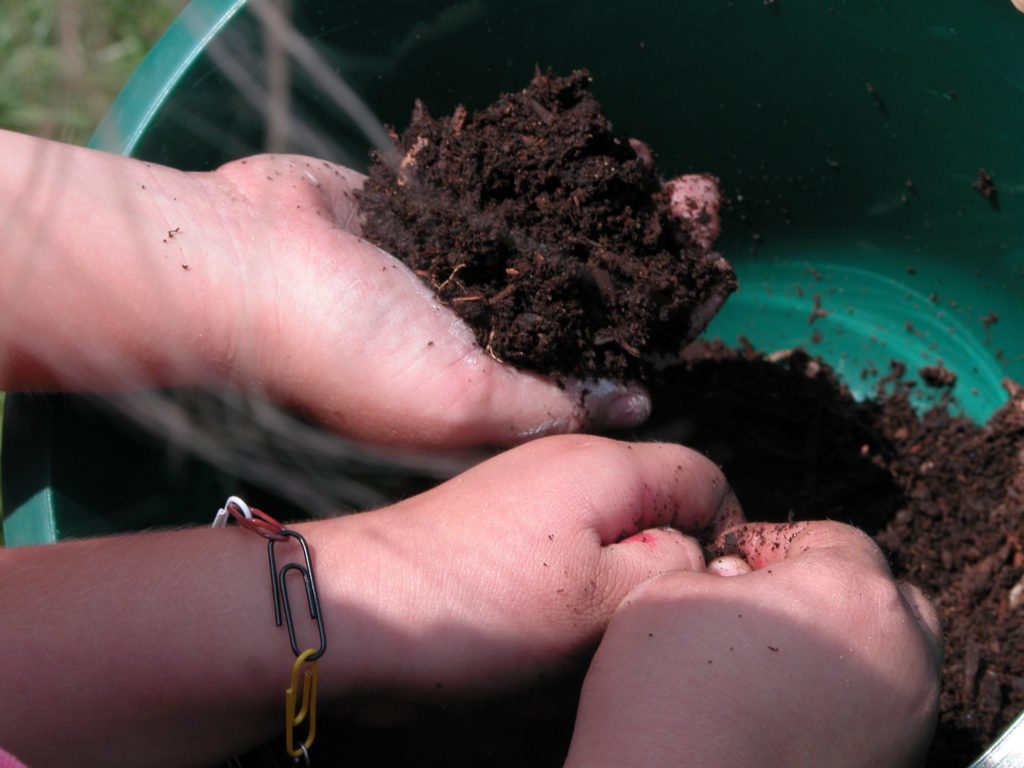
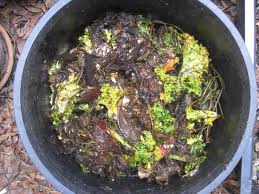
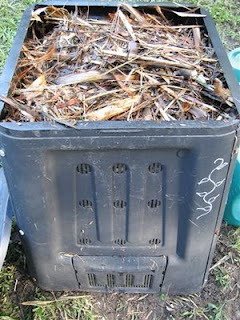
Compost is what you get when organic materials have completely broken down into a rich, dark, crumbly material – “black gold”. Finished compost is often called humus. Nature creates compost all the time without human intervention. Gardeners can speed up the composting process by creating the optimal conditions for decomposition: Air + Water + Carbon + Nitrogen = Compost The trick to accelerating decomposition is particle size. The ideal carbon-to-nitrogen (C:N) ratio for a compost pile is 30:1. Grass clippings have a C:N of about 16:1. Sawdust is about 400:1. Check OrganicGardening.com for the C:N ratios of common compost ingredients; then get out a calculator when building your pile.
Benefits of composting: Compost holds twice its weight in moisture that it slowly disperses to plants’ roots. Compost captures pollutants in the soil that could wash into your drinking water. The microbes in compost attack disease organisms in the soil before they get to your plants. Composting means successful gardening and a solution to waste-disposal problems. Improves the soil structure Increases the activity of soil microbes Enhances the nutrients of the soil Improve the chemistry of soil. Insulates changes in soil temperature Reduces the amount of solid waste you generate. Saves space in municipal landfills. Saves you tax money. Creates a useful natural fertilizer, more environmentally friendly than synthetic fertilizers.
The success of your garden depends on the soil, and the health of your soil depends on the compost you give it. Making compost isn’t difficult. The composition of the compost pile must be balanced for efficient decomposition. There must be plenty of air, adequate water (moist, but not wet), and the proper mix of carbon to nitrogen (about 30:1). Small particle size decomposes faster – Shred and chop – “the smaller, the better”. Pile should stay moist, but not wet. You may need to water occasionally.
If a very wet climate, you may need to cover the pile to keep it from becoming soggy. You can open up air holes by getting in there with a pitchfork or shift the entire pile over a few feet, bit by bit, taking care to move the outside to the inside of the new pile. Nothing is worse than cold, slimy compost! Three factors are usually to blame: poor aeration, too much moisture, or not enough nitrogen-rich material in the pile. The Process: Aerobic microorganisms make compost cook and cannot live in an oxygen-poor environment. Anaerobic bacteria don’t require air to thrive. These microbes eventually make compost, but work much more slowly. An anaerobic compost pile makes a home for sow bugs, pill bugs, and earwigs—all undesirables. Such a pile won’t get hot enough to kill any weed seeds it contains, either. Add manure or blood meal to get the pile going. Don’t let it dry out.
Microorganisms use up a lot of water. An adequate amount of soil provides enough microorganisms to start the process Microorganisms from the soil eat the organic (carbon containing) wastes producing a fiber-rich, carbon-containing humus with inorganic nutrients like nitrogen, phosphorus and potassium. They break the material down through aerobic respiration. Through the respiration process, the microorganisms give off carbon dioxide and heat — temperatures within compost piles can rise as high as 100 to 150 degrees Fahrenheit (38 to 66 C). If the compost pile or bin is actively managed by turning and watering regularly, the process of decomposing into finished compost can happen in as little as two to three weeks (otherwise, it may take months).
Compost Pile Foodweb: Bacteria and fungi break down the organic matter . Single-celled organisms (protozoa), small worms (nematodes), and mites feed on the bacteria and fungi. Larger predatory nematodes, predatory mites and other invertebrates (sow bugs, millipedes, beetles) feed on the protozoa, mites and nematodes. Water. Compost microbes need the right amount of water. Too much reduces airflow, causes temperatures to fall, make the pile smell; too little slows decomposition and prevents the pile from heating. Compost should feel like a wrung-out sponge. Carbon ingredients. The microbes that break down organic matter use carbon as an energy source. Ingredients with a high percentage of carbon are usually dry and brown or yellow. The most common are leaves, straw, and corn stalks. Nitrogen ingredients.
Microbes need nitrogen for the proteins that build their bodies. Ingredients high in nitrogen are generally green, moist plant matter, such as leaves, or manure. They are called greens, but in reality they can be green, brown, and all colors in between. C/N ratio. In order for a compost pile to decompose efficiently, you need the right ratio of carbon (C) to nitrogen (N) (C/N). Piles with too much nitrogen tend to smell. The excess nitrogen converts into an ammonia gas. Carbon-rich piles break down slowly. There’s not enough nitrogen for the microbe population to expand. An ideal compost pile should have a 30:1 C/N ratio. Grass clippings alone have about a 20:1 C/N ratio. Add one part grass clippings to two parts dead leaves.
Create an active compost pile. Provide a steady supply of water and air to the pile to encourage microorganisms that drive the composting process. Make sure your location is level and in partial shade. 4’x4′ palettes make a perfect square and are excellent compost bin walls. If you want to add soil amendments (bonemeal), add them when compost is finished Additives decompose and lose their valuable nutrients.
Making Compost Without a Bin You need:
1. A site that’s 3 feet long by 3 feet wide.
2. Carbon-rich materials (leaves, straw, dead flowers, shredded newspaper)
3. Nitrogen-rich materials (grass clippings, raw plant-based kitchen waste (peelings and rinds) and animal manure. Don’t use manure from carnivores
4. A shovel or two of garden soil. Spread a layer several inches thick of straw, cornstalks, or leaves where you want to build the pile. Top it with several inches of green stuff. Add a thin layer of soil. Add a layer of brown stuff. Moisten the three layers. Continue layering green and brown with a little soil until the pile is 3 feet high. Use a ratio of three parts brown to one part green. Keep adding until it gets at least 3 feet high. Occasionally turn the pile to aerate and keep the pile moist. Shovel out the finished compost and start the next pile with the material that hadn’t decomposed.
First layer Straw (not hay). Using straw as your first layer keeps your pile off the ground and keeps out weeds and pests. You can get straw at your local garden center.
Second layer Garden plants, kitchen scraps, equine stable bedding, and manure. Periodically sprinkle in compost with good bacteria as it helps speed up the process.
Third layer Shredded leaves. Shredding is good but not entirely necessary. Keep layering in straw for airflow. Repeat and finish with manure, compost, and lock in with straw. You can use cornstalks for extra aeration. The more manure, grass, and leaves the faster the process. For a fast cooking compost pile you need: 1/3 horse manure 2/3 leaves or grass If you don’t have access to a barnyard, substitute a high N product, such as blood meal.
Ingredients for compost: Fruit and vegetable wastes – peels, skins, seeds, leaves Eggshells, shellfish shells, fish heads Coffee grounds (including paper filters), tea bags, paper napkins Corncobs (shred to make them break down quickly) Yard waste Grass clippings Leaves Pine needles Weeds (no invasive weeds) Woody materials (branches, twigs) Straw, sawdust, hay Newspaper Seaweed, kelp or marsh grass washed in fresh water to remove salt
SHOULD NOT BE COMPOSTED: Human waste or pet litter Diseased garden plants Invasive weeds Charcoal ashes are toxic to soil microorganisms. Pesticide-treated plant material harmful to the compost food web organisms, and pesticides may survive into the finished compost.
You are one of the Chosen Ones, called to give away your riches. Give a bag with a scoop of your finest compost to unenlightened gardeners you meet.
Compost tea is an effective, low-strength, natural fertilizer for seedlings and garden plants, and it can suppress fungal plant diseases. The tea-brewing process extracts, and in some cases grows and multiplies, nutrients and beneficial bacteria and fungi from compost and suspends them in water in a form that makes them quickly available to plants.
Making compost tea:
1. Place compost and water (10 pounds mature compost for 10 gallons of water) in a 40-gallon barrel. Protect the barrel from cold and heat.
2. Stir with a stick daily for a minimum of 5 days.
3. Strain the liquid from the compost after 5 days, using cheesecloth or burlap. There should be no bubbling or off odors. Use the compost tea immediately, without further dilution. When you brew compost tea use mature, sweet, earthy-smelling compost. Keep in mind that E. coli can be present in the raw ingredients of a compost pile. Maintain a hot pile or allow the compost to mature fully. Don’t apply compost tea to any vegetable within 3 weeks of its planned harvest date.