by Susan Dean | Feb 6, 2018 | Self Science

Tea-Staining
1. Boil 4 cups of water in a medium-sized pot.
2. Add 4 or more bags of strong black tea (we used Prince of Wales) to the boiling water, depending how dark you want your stain.
3. Continue to boil until the water is reduced by about half, around 20 to 30 minutes.
4. Remove from heat and allow tea to cool for about 10 minutes.
5. Place a towel underneath the object to be stained to absorb drips.
6. If you are staining a lampshade, like we did, perch the center of it on a vase or similar object to keep it raised above the towel (for drying).
7. Paint the tea on with a foam brush (that’s the route we chose), a regular brush, a rag or whatever works for you.
8. Be sure to brush out any streaks, unless you want them.
9. Use a lint-free towel to remove any drips, if necessary.
10. Let dry before handling.
by Susan Dean | Feb 6, 2018 | Self Science
Charcoal Crystal Garden
6 or 7 charcoal briquettes
6 tablespoons warm water
6 tablespoons liquid bluing
4 tablespoons of table salt
1 tablespoon ammonia
Pile the briquettes in a shallow dish. In a separate dish mix the water and bluing together, then stir in the salt and the ammonia. Pour evenly over the charcoal.
Fluffy white crystals grow on the charcoal. As the water in the solution evaporates, the chemicals left behind on the charcoal form crystals. These crystals are porous and the solution continues to be wicked up through them resulting in layers of beautiful white crystals. For different crystal colors place a few drops of food coloring onto the coals after pouring on the solution. You can keep your garden growing by adding more solution every day.
by Susan Dean | Feb 6, 2018 | Self Science
Tumeric Dip Sticks
You will need:
1/3 cup rubbing alcohol
1/4 teaspoon of tumeric
Q-tips
solutions to test the dip sticks such as ammonia, lemon juice, vinegar, baking soda dissolved in a little water
Tumeric dipsticks are base indicators – a substance that turns another color in the presence of an acid or base.
Pour the alcohol into a small jar and stir in the tumeric.
Dip both ends of the Q-tips and let dry on a paper towel.
If you open a bottle of ammonia and hold the sticks over the fumes and the bright yellow dipstick turns a brilliant red.
Put it in vinegar and it turns yellow again.
Try the other solutions and see what happens. This is a good example of a chemical reaction.
by Susan Dean | Feb 6, 2018 | Self Science

Old Fashioned Volcano
Newspaper Plastic shopping bag
Empty baby bottle Masking tape
1 cup white glue 1 cup water
Brown tissue paper cut in strips
Clear acrylic spray paint
1 tablespoon liquid dish detergent
1 teaspoon red food coloring
1 tablespoon baking soda
1/3 cup vinegar
Disposable aluminum oven liner
To form the volcano, crumple up some newspaper and put into plastic shopping bag. Nestle the baby bottle into the center of the newspaper and gather the opening of the bag around the neck. Tape the bag into place around the neck of the bottle. Shape the volcano around the bottle using masking tape and place the bag on the oven liner.
Mix the glue and water together in a large bowl. Dip strips of newspaper in the glue mixture and cover the bag volcano shape allowing them to run onto the liner. For the last layer dip the brown tissue strips in the glue mixture and cover the volcano. Allow to dry for several days. When dry spray with clear acrylic. Now it’s ready to try!
Place the liquid detergent, food coloring, and baking soda into the bottle. Pour the vinegar in last. The vinegar (an acid) reacts with the baking soda (a base) to produce carbon dioxide. The pressure of the expanding carbon dioxide pushes the foam from the bottle creating a lava effect!
When finished, carefully tip the volcano upside down in a sink to empty out the rest of the lava.
by Susan Dean | Feb 6, 2018 | Self Science
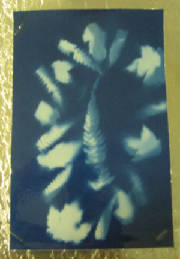
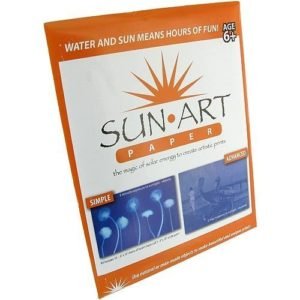
SUNPRINTS
These are fun to make.
You can order the paper – PE1435 11X17 NATURE PRINT PPR PK2 ( $22.44 with shipping) from S&S worldwide(800) 288-9941.
There are 20 large sheets and I cut each into 4 pieces which are large enough for a print.
Album pages from photo albums that have the clear cover that peels back works great for holding the leaf designs on the paper and in place.
Take them outside and expose to the sun for a few minutes and then bring them inside
Remove the leaves and put into a tray of water for a minute to develop, then let dry.
GET PAPER FOR SUN ART HERE