Making a Worm Bucket for Your Garden
Get a plastic 5 gallon bucket with a lid. These are cheap at most home centers.
Cut the bottom out of your bucket, and, if you have a large drill bit, drill several 3/4″ to 1″ holes all around the bottom quarter of your bucket. Doing these two things allows your worms to come and go as they please — which is exactly what you want. If you aren’t able to drill holes, it will still work, so don’t let that stop you.
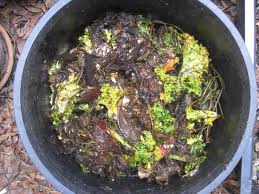
Place your bucket in your garden bed, sinking the bottom quarter of it down into the soil. Now you can start filling the bucket with kitchen scraps, coffee grounds, tea bags, crumble egg shells, shredded newspaper — anything you’d add to a traditional worm bin. Put the lid on, and you’re done.
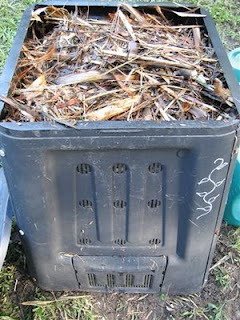
At a Worm Farm, a Bucket Bin, and a Worm Bin!

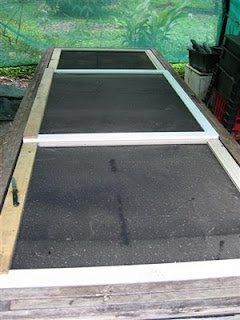
A worm farm covered in secure recycled fly screen doors that will keep everything out. Mice eat worms and can eat through shadecloth, but they can’t eat through metal fly screen.

A worm bucket

A worm farm covered in secure recycled fly screen doors. They will keep everything out. Mice love to eat worms and can easily eat through shadecloth, but they can’t eat through metal fly screen!
Worm Farming
A worm farm is a busy place packed full of microbial life of which the worm is the top of the food chain.
Worms eat microbes, they don’t eat the food you put in there. If worms ate vegetables they would crawl out of the soil in your vegie garden every night and eat it!
Worms live underground and no leafy lettuces are there! There are plant roots and worms will eat them as they break down in the soil, but they mainly feed on microbes. If you can get that concept you can go a long way to trouble shooting a lot of common problems. Worms eat the microbes that are invisible to the human eye but are responsible for most of the decomposition process.
The bottom of the soil food chain is bacteria. Bacteria are the most common thing you’ll find in a worm farm and just like a healthy gut, your soil (and compost systems and worm farms) all need bacteria in there to remain healthy.
Next up are fungi, then algae, protozoa, nematodes (of which 80% are beneficial in the soil), and a whole world of microbes.
Then we have the creatures we can see. These are the arthropods – spiders, beetles etc. you’ll find on healthy soil when you pull the mulch back. Healthy soil will be alive and jumping with little creatures running over the surface. All these creatures eat each other. They all live, breed, excrete, eat and die in the soil and become part of the soil.
This all happens within your worm farms and compost systems. Bacteria are the bottom of the food chain and they begin the work of turning your putrescible waste into soil. Worms are the top of the soil food chain. So a healthy worm farm will have all sorts of creatures in it.
Keeping your farm healthy means keeping the food turning over quickly, getting it all consumed by the microbes before it goes ‘putrid’. The term putrescible waste refers to the kitchen scraps and such we send to landfill that convert to methane gas when they go putrid.
To keep the food turning over and being broken down quickly by the microbes (who will in turn be eaten by your worms) is a bit of a balancing act.
Getting the amounts right is a matter of keeping an eye on things. Worms are a little picky. There are definite likes and dislikes.
If you have overfed and the food is going slimy and foul smelling (which may in turn cause an explosion of one type of microbe – maybe mites – over all the others) remove the food and put it in the compost bin and cover with soil or some type of carbon layer. Then add a smaller amount of new fresh food to your worm farm. Mites do not harm the worms and also compost. They help to break down the fibrous materials. If present in large proportions – leave the lid off the farm and expose the surface of the bedding to sunlight. Food should be being consumed and turned into castings before it goes putrid.
‘Bacterialise’ it. This means putting something over the top of it to make it extra nasty for microbes. Liquid from the worm farm is a good bacterialiser, as is diluted kelp or diluted molasses. Very weak solutions of molasses, kelp or liquid worm castings will attract the bacteria and as they are at the bottom of the food chain all the rest will follow.
Chop the food up finely. This increases its surface area, starts breaking it down and helps the microbes get through it quicker.
If the farm gets too wet, leave the lid off for a little while and let it dry out a bit. Too much moisture may cause an explosion of one type of microbe over the others. It should be pretty balanced in there.
Castings should have the feel of a kitchen sponge that has been wet then well rung out – damp, but not wet.
When the worm farm is operating successfully and you notice pests like mites, vinegar flies, maggots or slugs just dust the top with a little lime. Check to make sure you haven’t added too much food.
